Recovery of CANDICE Displays
If a CANDICE display is in an undefined state,
it can be brought to the delivery state.
Applicable to these Products
Procedure:
- Prepare an empty directory on your PC anywhere, e.g. C:\Temp\CandiceRecovery.
- Download the Recovery-Tool and unzip it in the directory.
-
Download the operating system image
tegra_winceimage_2.4_20220107_bis.zip
form the Toradex download page,
save it and unzip it into the directory. - Connect the mini USB port of the CANDICE display to a USB port of your PC.
-
On the CANDICE device, press the recessed recovery button and raise the
supply voltage while the recovery button is pressed. Make sure that the
supply is activated either by KL15 KL15 is the ignition terminal of the vehicle.
or openABK RUN line. KL15 KL15 is the ignition terminal of the vehicle. may also be activated permanently.


-
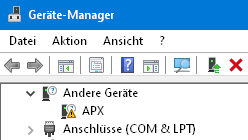
Install the driver for the Recovery-Tool by clicking with the right mouse button in the device manager
to Other devices ->
and . Then click on
and
navigate to the directory containing the driver (in the example
C:\Temp\CandiceRecovery\usbpcdriver_32_64). Confirm the installation.
-
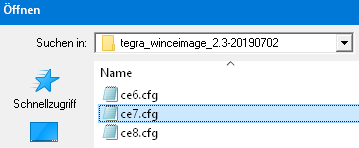
Start the batch file
Update.batand eventually confirm safety information by clicking on ) and then choose the filece7.cfg.
-
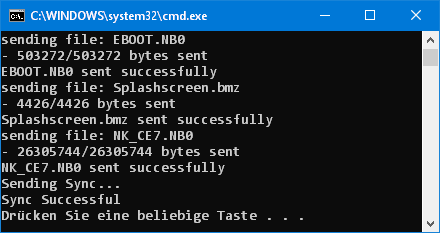
Wait until the flash process completed (approximately. 10...20 seconds) and
the message Press any key to continue... appeared.
- The CPU now works with a standard image and outputs a start sound after a few seconds. Occasionally, you may not be able to see anything on the screen. To install the firmware now, please follow the steps on the firmware update page.
- Restart the CANDICE device
Possible Complications:
-
When flashing, the console window displays a message that the device was
not found.
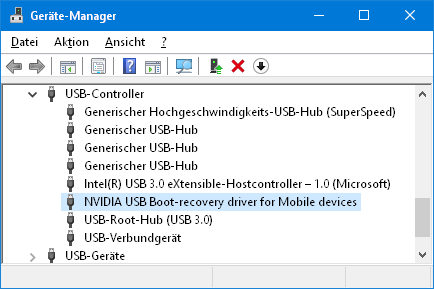
Make sure that the recessed recovery button is pressed when applying the supply voltage. There is a clear pressure point. Also check if NVIDIA USB boot-recovery driver for mobile devices is listed in Control Panel.
- During the firmware update, a voice sounds from the speaker. If the internal device identifier (CANDICE-4 vs. CANDICE-7, device version, etc.) is inconsistent, wait until the corresponding device is mentioned by the voice and at that moment press anywhere on the touch screen. Alternatively, you can type the appropriate letter on an attached USB keyboard.
-
After the firmware update, there is no decent image to be seen
(unclean edges of the fonts, flowing image).
In this case, the resolution is incorrect because the device ID is incorrect.
Connect a USB keyboard, set up the supply voltage and plug the USB stick with the firmware and instantly press the -Key on the keyboard. Now, you will hear the voice. Please follow the instructions above.